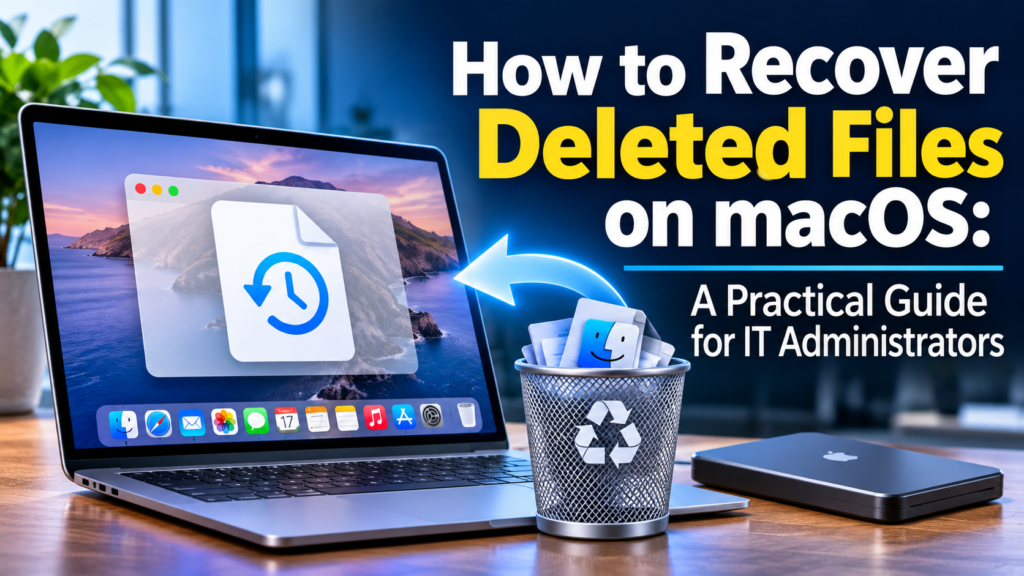
When important files are deleted from a company Mac, IT administrators must recover them while protecting sensitive business data. However, missing backups, FileVault encryption, and SSD limitations can make recovery more difficult.
Fortunately, there are several recovery options, including Time Machine, iCloud, and dedicated software. In this guide, we explain when to use each method, the recovery limitations of modern Macs, and what IT administrators should consider when recovering corporate data.
How to Prepare a Mac for Data Recovery
If you’ve already emptied Trash on Mac but have backups, restoring deleted files is usually straightforward. However, if backups were never created or Time Machine has already deleted older backups, recovery chances depend largely on the storage device.
On both internal and external HDDs, deleted files may remain recoverable until new data overwrites them. SSDs behave differently. They use the TRIM command to identify data blocks that are no longer needed. Once those blocks have been cleared, recovery becomes impossible without backups.
On modern Macs, TRIM is enabled automatically for internal SSDs. With external SSDs, its behavior depends on the connection type, enclosure, and file system. Compatible Thunderbolt SSDs generally support TRIM, while support for USB-connected SSDs varies. If TRIM hasn’t been executed and the data hasn’t been overwritten, recovery may still be possible.
To recover permanently deleted data with no backups, take the following steps:
- Stop writing new data. Avoid installing applications, downloading files, or running disk repairs on the affected drive to prevent overwriting recoverable data.
- Verify disk access. If FileVault is enabled, ensure you have the necessary credentials or recovery key to unlock the encrypted volume.
- Start recovery with dedicated software as soon as possible. The sooner you begin the recovery process, the lower the risk of losing recoverable data.
How to Recover Permanently Deleted Files on macOS
Here are three methods you can use to recover deleted files on Mac. If you don’t have backups, start with data recovery software immediately to minimize the risk of overwriting deleted data. If you have backups, Time Machine or iCloud are your best options for restoring the missing files.
Method 1. Recover Deleted Files Mac Without Backup With Recovery Software
If you’ve already emptied the Trash or permanently deleted files and don’t have Time Machine, iCloud, or other backups, you should start with data recovery software as soon as possible. It’s because new data written to the affected drive can reduce recovery chances, while backups remain available regardless of when you check them.
For this method, we’ll use Disk Drill as an example, as it’s one of the best data recovery software for Mac. It supports APFS, HFS+, and other file systems and can scan both internal and external storage. However, it’s generally more effective for recovering deleted files from external HDDs, USB flash drives, and memory cards, since TRIM can make recovery from internal Mac SSDs difficult or impossible. Disk Drill includes a Byte-to-byte Backup feature that lets you create a disk image and scan it instead of the original drive, helping preserve its condition. Additionally, it supports macOS Recovery Mode, allowing you to scan the internal drive without booting into the regular macOS environment and minimizing background disk activity during recovery.
Disk Drill is a security-conscious option for corporate use. According to CleverFiles’ Terms of Service, the developer cannot view, store, or transfer the contents of files recovered during scanning and recovery. The software also has an Enterprise edition that offers licensing for multiple devices, with a single license covering both macOS and Windows.
Follow these steps to recover deleted files on Mac without backup:
- Download and install Disk Drill on your Mac. Install it on a different drive from the one containing the deleted files.
- Grant Full Disk Access when prompted. You can manage this permission under System Settings > Privacy & Security > Full Disk Access.
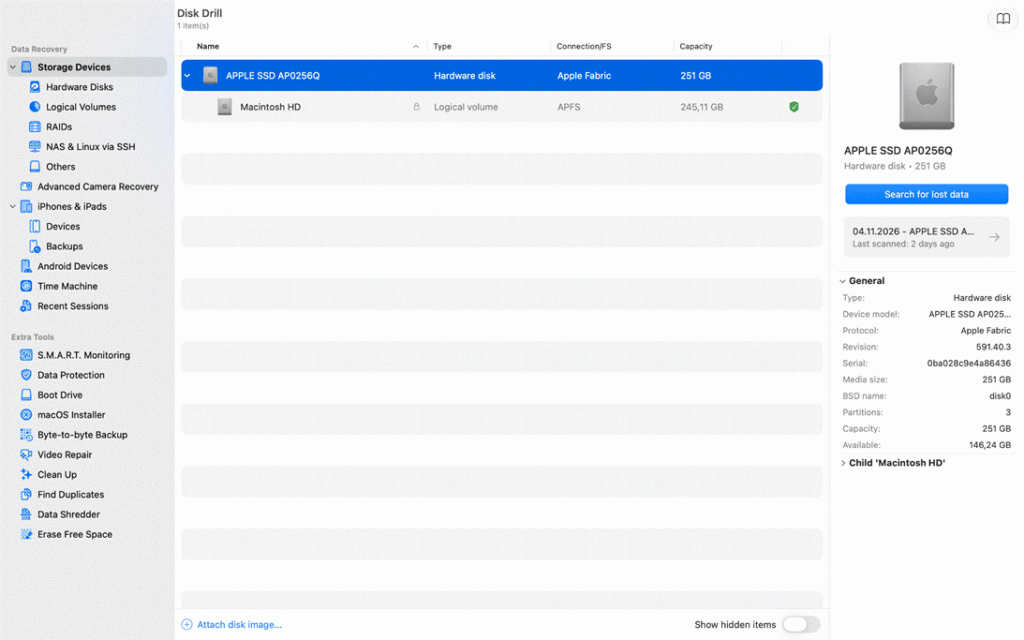
- Select the affected storage device from Disk Drill’s device list.
- Click Search for lost data. If you recover from external drive choose Universal Scan to search for deleted files.
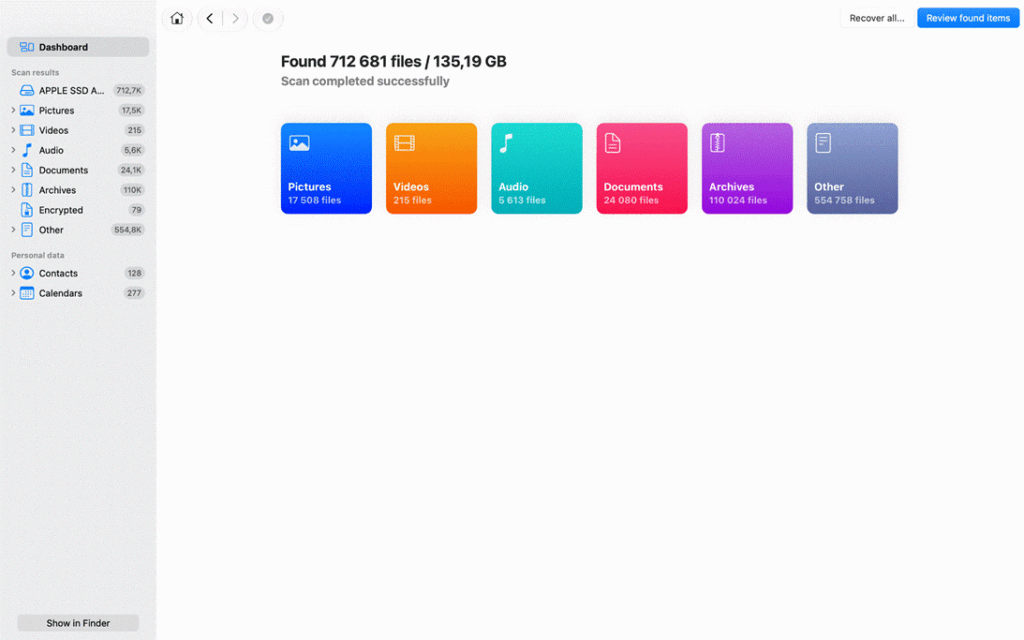
- When the scan is complete, click Review found items. Use filters to locate specific documents, folders, or other files. Preview important files to verify their contents.
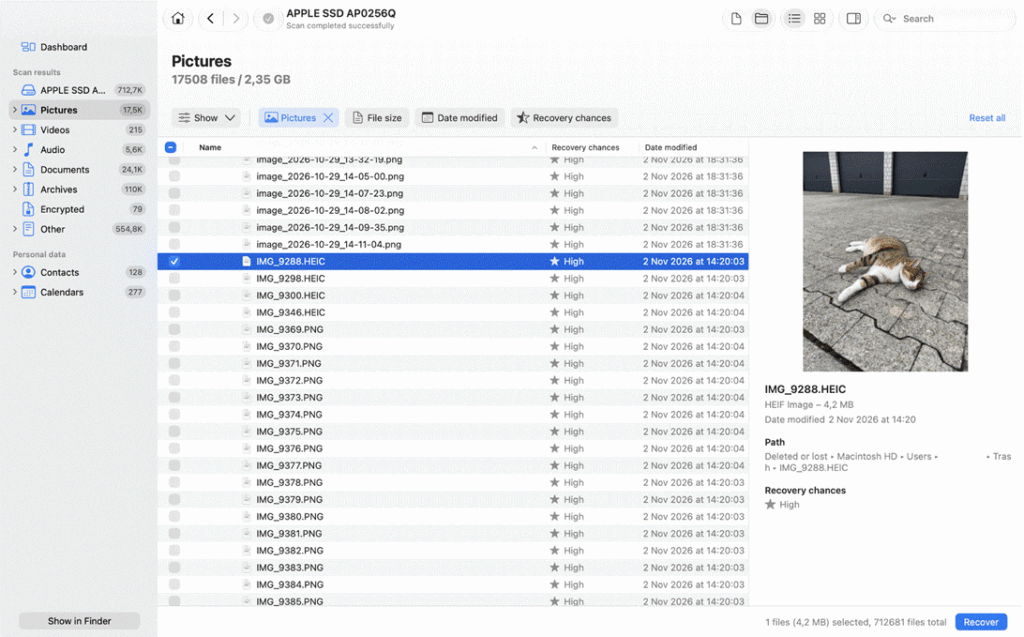
- Select the files you need, click Recover, and save them to a different physical drive to avoid overwriting other recoverable data.
Method 2. Recover Deleted Files Mac With Time Machine
Instead of restoring the entire Mac, you can use Time Machine backups or local APFS snapshots to recover specific files, folders, or previous document versions. This targeted approach allows you to restore missing data without affecting the current system configuration, installed applications, or MDM settings.
To restore specific files from a Time Machine backup:
- Connect the Time Machine backup drive to your Mac or ensure the network backup is accessible.
- Open Finder and navigate to the folder where the deleted files were originally stored.
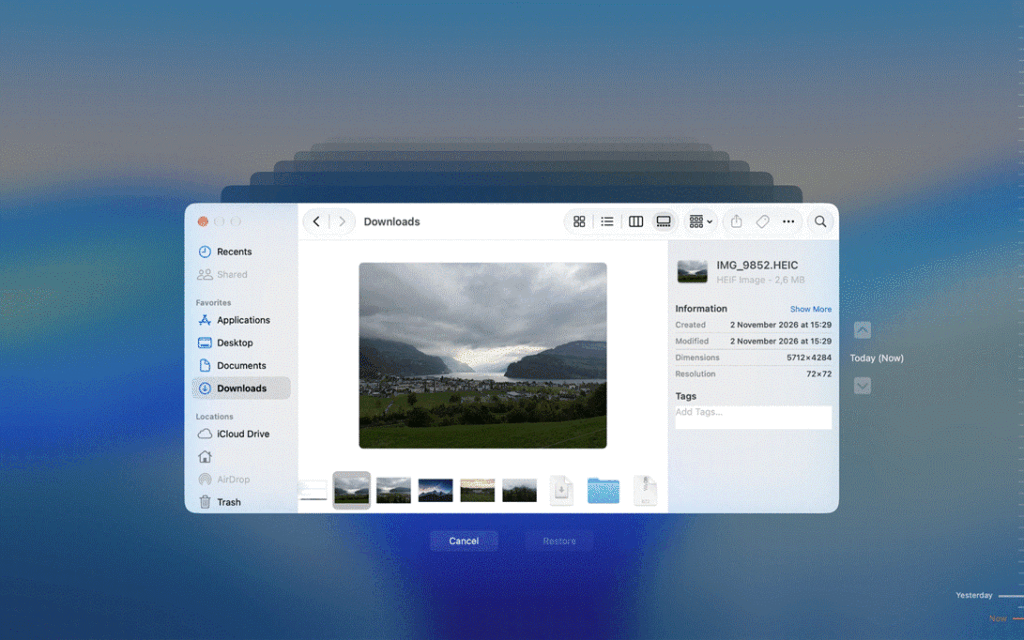
- Click the Time Machine icon in the menu bar and select Browse Time Machine Backups.
- Use the timeline and arrows to locate a backup created before the deletion.
- Select the specific files or folders and click Restore to return them to their original location.
Alternatively, you can restore individual files through Terminal. Run tmutil listbackups to identify available backups. To mount and list backup snapshots, use sudo tmutil listbackups -d “/Volumes/BackupDrive” -m, replacing the drive name with your actual backup volume. Then run tmutil restore “source_file_path” “destination_file_path” to extract the required file to a secure location without restoring the entire backup.
If the TM backup drive isn’t available, use local snapshots for APFS data recovery:
- Open Terminal and run tmutil listlocalsnapshots / to check available snapshots.
- Create a temporary mount directory using sudo mkdir -p /tmp/snapshot_mount.
- Mount the required snapshot in read-only mode using sudo mount_apfs -o rdonly -s SNAPSHOT_NAME /System/Volumes/Data /tmp/snapshot_mount. Replace SNAPSHOT_NAME with the name returned in step 1.
- Copy the required file to a separate drive using sudo ditto /tmp/snapshot_mount/Users/USERNAME/Documents/TargetFile.docx /Volumes/AdminExternal/TargetFile.docx. Replace the username, file path, and destination with your actual values.
- Run sudo umount /tmp/snapshot_mount to unmount the snapshot after recovery.
Method 3. Restore Deleted Files From iCloud
Although iCloud Drive syncs deletions across connected devices, you can still check its Data Recovery feature to see if the files you need are available for restoration.
- Open iCloud.com and sign in to the Apple Account.
- Scroll down and select Data Recovery.
- Click Restore Files to view available deleted files.
- Select the files you want to recover and click Restore to return them to their original locations.
Is It Safe to Use Data Recovery Software?
Using data recovery software on company Macs is generally safe, provided you choose a reputable tool and follow your organization’s security policies. Before installing recovery software, consider the following precautions to perform save macOS data recovery:
- Check the software’s reputation. Choose software from an established developer with a good track record. Read user feedback and independent reviews on different websites to see how the software performs in real recovery scenarios.
- Review privacy and data-handling policies. Check the privacy policy and terms of service on the developer’s official website. Pay attention to how the software accesses, processes, stores, or shares data from your drives, especially sensitive company files.
- Look for offline recovery capabilities. Prefer software that can scan drives and recover files locally without uploading their contents to external servers. Check whether an internet connection is required for activation or certain features.
- Download from official sources. Always download recovery software from the developer’s official website to avoid malware or modified installers.
- Control permissions. Grant Full Disk Access only when necessary and ensure that the recovery process is authorized.
- Protect sensitive data. Save recovered files to secure, company-approved storage rather than personal drives or accounts.
- Scan a disk image instead of the original drive. Whenever possible, create a byte-to-byte image and scan it instead of the original storage device. This helps preserve the source drive and reduces the risk of unintended changes during recovery.